


Troubleshooting
Cooking techniques, product deep-dives, kitchen design ideas, and health-conscious living — curated by the FOTILEteam.
Occasional issues may arise during daily use. You can resolve many of these issues by yourself without the need for a technician. The following information provides remedies to many of those situations. You can alternatively search for a solution using the visual navigation below:
Range Hoods
Cause:
LED lights broken or other.
Solution:
- Check power source.
- Check if other parts are functioning and contact Customer Service.
Cause:
Push rod may be worn out.
Solution:
- Check if other parts are functioning and contact Customer Service.
Cause:
Oil Filter may not have been installed correctly.
Solution:
- Open the baffle plate and reinstall the oil filter.
Cause:
Range hood may be installed too high or too low.
Solution:
- We recommend the range hoods to be installed at a height of 29.5 in to 32.5 in (from the cooktop to the bottom of the upper cabinet) Please reinstall if needed.
- Contact Customer Service if needed.
Cause:
Ducting may be too long, blocked or kinked.
Solution:
- Check the diameter of the duct (ideally it should be at least 6 inches).
- Check if the vent ducting can be shortened. Seek advice from a specialist.
- Check if the ducting is blocked.
- Check if the ducting is kinked.
Cause:
You will need to purchase a new part.
Solution:
- Confirm the range hood's model and the part that is broken and purchase it here.
Cause:
- M5 X 70 fastening screws for upper cabinet are too tight.
- Oil Filter was not installed correctly.
Solution:
- Loosen each M5 X 70 fastening screws on the left side by 5-6 turns.
- Check the oil filter.
Cause:
The appliance may be unplugged.
Solution:
- Check power supply.
- Contact Customer Service for support.
Cause:
LED lights have been damaged.
Solution:
- Contact Customer Service for support.
Cause:
LED lights broken or other.
Solution:
- Check power source.
- Check if other parts are functioning and contact Customer Service.
Cause:
Range hood may be installed too high or too low.
Solution:
- We recommend the range hoods to be installed at a height of 29.5 in to 32.5 in (from the cooktop to the bottom of the upper cabinet) Please reinstall if needed.
- Contact Customer Service if needed.
Cause:
Ducting may be too long, blocked or kinked.
Solution:
- Check the diameter of the duct (ideally it should be at least 6 inches).
- Check if the vent ducting can be shortened. Seek advice from a specialist.
- Check if the ducting is blocked.
- Check if the ducting is kinked.
Cause:
You will need to purchase a new part.
Solution:
- Confirm the range hood's model and the part that is broken and purchase it here.
Cause:
Fixing screws of the smoke baffle
The M4×8 screws were not used.
Solution:
Open the baffle plate and use the screws (M4×8) to fix the plate (Please refer to the user's manual).
Cause:
The appliance may be unplugged.
Solution:
- Check power supply.
- Contact Customer Service for support.
Cause:
LED lights have been damaged.
Solution:
- Contact Customer Service for support.
Cause:
LED lights broken or other.
Solution:
- Check power source.
- Check if other parts are functioning and contact Customer Service.
Cause:
Push rod may be worn out.
Solution:
- Check if other parts are functioning and contact Customer Service.
Cause:
Oil Filter may not have been installed correctly.
Solution:
- Open the baffle plate and reinstall the oil filter.
Cause:
Range hood may be installed too high or too low.
Solution:
- We recommend the range hoods to be installed at a height of 29.5 in to 32.5 in (from the cooktop to the bottom of the upper cabinet) Please reinstall if needed.
- Contact Customer Service if needed.
Cause:
Ducting may be too long, blocked or kinked.
Solution:
- Check the diameter of the duct (ideally it should be at least 6 inches).
- Check if the vent ducting can be shortened. Seek advice from a specialist.
- Check if the ducting is blocked.
- Check if the ducting is kinked.
Cause:
You will need to purchase a new part.
Solution:
- Confirm the range hood's model and the part that is broken and purchase it here.
Cause:
- Incorrect gesture.
- The function may have been locked or broken.
Solution:
- Make sure to wave hands quickly through the sensor windows at two sides.
- While the range hood is off, press Lighting and Medium-setting Fan at the same time for 5 seconds to turn on/off the GESTURE function (Try to wave each time until it starts to work).
Cause:
- M5 X 70 fastening screws for upper cabinet are too tight.
- Oil Filter was not installed correctly.
Solution:
- Loosen each M5 X 70 fastening screws on the left side by 5-6 turns.
- Check the oil filter.
Cause:
The appliance may be unplugged.
Solution:
- Check power supply.
- Contact Customer Service for support.
Cause:
LED lights have been damaged.
Solution:
- Contact Customer Service for support.
Cause:
- You may need to change the oil cup.
Solution:
- Contact Customer Service for support.
Cooktops
Cause:
Make sure everything was taken out of the box and foam.
Solution:
- Check the box and make sure, Contact Customer Support.
Cause:
The LP gas kit was not changed correctly.
Solution:
- Please follow the guide in the manual to change the kit.
Cause:
General gas valve is not opened.
Solution:
Turn on the general gas valve.
Cause:
Gas pipe is bent/flattened.
Solution:
Change/fix the gas pipe.
Cause:
Safety valve does not open.
Solution:
Press and turn the knob to intense fire, make sure the hob is fired and keep pressing for 3-4 seconds.
Cause:
Burner heads and caps are not in place.
Solution:
Remove the burner caps.
Cause:
Ignition device is dirty or wet.
Solution:
Wipe with a dry cloth.
Cause:
Ignition pin is not in the right position or broken.
Solution:
Contact Customer Support.
Cause:
- Batteries may need to be changed.
Solution:
- Change the battery (D5).
Cause:
- Gas pipe may be broken.
- The pipes are not connected correctly.
Solution:
- Change the gas pipe/tube.
- Replace hose.
Cause:
The burner's nozzle may be blocked.
Solution:
Clean the fire hole surface on the burner with something sharp like a toothpick.
Cause:
Burners may be dirty or nozzle is blocked.
Solution:
Remove the burners and clean with water and wipe dry.
Cause:
Make sure everything was taken out of the box and foam.
Solution:
- Check the box and make sure, Contact Customer Support.
Cause:
General gas valve is not opened.
Solution:
Turn on the general gas valve.
Cause:
Gas pipe is bent/flattened.
Solution:
Change/fix the gas pipe.
Cause:
Safety valve does not open.
Solution:
Press and turn the knob to intense fire, make sure the hob is fired and keep pressing for 3-4 seconds.
Cause:
Burner heads and caps are not in place.
Solution:
Remove the burner caps.
Cause:
Ignition device is dirty or wet.
Solution:
Wipe with a dry cloth.
Cause:
Ignition pin is not in the right position or broken.
Solution:
Contact Customer Support.
Cause:
- Batteries may need to be changed.
Solution:
- Change the battery (D5).
Cause:
- Gas pipe may be broken.
- The pipes are not connected correctly.
Solution:
- Change the gas pipe/tube.
- Replace hose.
Cause:
The burner's nozzle may be blocked.
Solution:
Clean the fire hole surface on the burner with something sharp like a toothpick.
Cause:
Burners may be dirty or nozzle is blocked.
Solution:
Remove the burners and clean with water and wipe dry.
Cause:
Make sure everything was taken out of the box and foam.
Solution:
- Check the box and make sure, Contact Customer Support.
Cause:
General gas valve is not opened.
Solution:
Turn on the general gas valve.
Cause:
Gas pipe is bent/flattened.
Solution:
Change/fix the gas pipe.
Cause:
Safety valve does not open.
Solution:
Press and turn the knob to intense fire, make sure the hob is fired and keep pressing for 3-4 seconds.
Cause:
Burner heads and caps are not in place.
Solution:
Remove the burner caps.
Cause:
Ignition device is dirty or wet.
Solution:
Wipe with a dry cloth.
Cause:
Ignition pin is not in the right position or broken.
Solution:
Contact Customer Support.
Cause:
- Batteries may need to be changed.
Solution:
- Change the battery (D5).
Cause:
- Gas pipe may be broken.
- The pipes are not connected correctly.
Solution:
- Change the gas pipe/tube.
- Replace hose.
Cause:
The burner's nozzle may be blocked.
Solution:
Clean the fire hole surface on the burner with something sharp like a toothpick.
Cause:
Burners may be dirty or nozzle is blocked.
Solution:
Remove the burners and clean with water and wipe dry.
Cause:
Make sure everything was taken out of the box and foam.
Solution:
- Check the box and make sure, Contact Customer Support.
Cause:
General gas valve is not opened.
Solution:
Turn on the general gas valve.
Cause:
Gas pipe is bent/flattened.
Solution:
Change/fix the gas pipe.
Cause:
Safety valve does not open.
Solution:
Press and turn the knob to intense fire, make sure the hob is fired and keep pressing for 3-4 seconds.
Cause:
Burner heads and caps are not in place.
Solution:
Remove the burner caps.
Cause:
Ignition device is dirty or wet.
Solution:
Wipe with a dry cloth.
Cause:
Ignition pin is not in the right position or broken.
Solution:
Contact Customer Support.
Cause:
- Batteries may need to be changed.
Solution:
- Change the battery (D5).
Cause:
- Gas pipe may be broken.
- The pipes are not connected correctly.
Solution:
- Change the gas pipe/tube.
- Replace hose.
Cause:
The burner's nozzle may be blocked.
Solution:
Clean the fire hole surface on the burner with something sharp like a toothpick.
Cause:
Burners may be dirty or nozzle is blocked.
Solution:
Remove the burners and clean with water and wipe dry.
Steam Ovens
Cause:
- Water tank may not be pushed into the slot or pushed into the wrong place.
- There may not be enough water.
Solution:
- Fill the water tank until it reaches "Max", the highest water level scale line.
- Place the water tank into the slot and push it into the right spot
Cause:
Refer to the manual to see the meaning of the code.
Solution:
Contact Customer Support for assistance.
Cause:
- Water tank may not be pushed into the slot or pushed into the wrong place.
- There may not be enough water.
Solution:
- Fill the water tank until it reaches "Max", the highest water level scale line.
- Place the water tank into the slot and push it into the right spot.
Cause:
Refer to the manual to see the meaning of the code.
Solution:
Contact Customer Support for assistance.
Convection Ovens
Cause:
- Functions may not have been set properly.
Solution:
Check that the function and the temperature have been set to the function and temperature needed.
Cause:
Not a malfunction: the cooling fan will continue to run after the oven has been shut off to prevent any humidity building up on the oven, the control panel, or inside of the oven. When the temperature has reached a certain level, the fan will turn off.
Solution:
If there is any abnormal noise, please contact Customer Support with a video.
Cause:
- Temperature not set properly.
- Tray/racks may not be leveled.
Solution:
- Check that the correct temperature was set.
- Check that the tray/rack is placed correctly and leveled with the shelf.
Cause:
- Temperature may be too high.
- Wrong shelf level was used.
Solution:
Check temperature and correct shelf level.
Cause:
You may have forgotten to press "OK".
Solution:
Press "OK" and confirm.
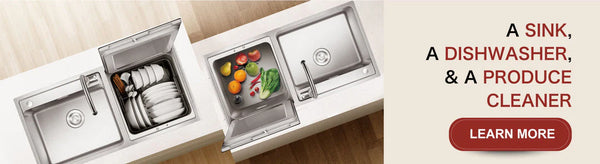
In-Sink Dishwasher
Cause:
- The spray arm may not be correctly installed.
- Collision caused by improperly place tableware.
Solution:
- Remove and reinstall the spray arm.
- Refer to the manual and make sure the tableware are placed as required.
Cause:
The power source may not be connected properly.
Solution:
Check the power cord.
Cause:
There may be lack of cleaning.
Solution:
Please maintain the product according to the daily cleaning steps.
Cause:
The drain valve may be closed (turned off).
Solution:
In shutdown mode, press and hold the "LEVEL" key for 2 seconds to open the drain valve.
Cause:
The power may have been cut off while operating.
Solution:
To manually open the door, open the lower cabinet and locate the white door string. Gently pry the food armrest with a slotted screwdriver while pulling down the string at the same time.
Cause:
Door is open or there may be a door lock fault.
Solution:
Gently press the door downwards. For more assistance, please contact Customer Support.
Please contact Customer Support.
Electric Range
Normally, the door seal should not fall off. If it does, you can press it back into place.
Contact our customer service for repair. The knob light not working does not affect usage.
Interior paint peeling is usually caused by hard impacts. Stainless steel rusting is usually due to longterm exposure to high-salt, humid environments or improper cleaning.
You can open it manually. You can also contact our customer service for repair.
You can replace just the glass.
1. Press the "Clock" button.
The display will show "---am" (default is 12-hour format in the morning). If needed, press the "Clock" button again to switch to "pm" (afternoon).
2. Use the number keypad to enter the current hour and minute. For example, press 9, 3, 0 for 9:30.
3. Press the "Start/OK" button to save the changes.
It will not break. The heavy door indicates sturdy materials and good sealing.
Complete Your Kitchen


